
Hey there, apple pie lovers! 🍏 So, you’re craving a warm, flaky apple pie but don’t want to spend hours in the kitchen, right? Well, you’ve come to the right place! Honestly, I used to think making a pie from scratch was something only grandmas with secret recipes could pull off. But, spoiler alert: It’s way easier than you think—and I’m about to show you how!
I’m not here to overwhelm you with complicated steps or fancy ingredients. Nope! We’re keeping this simple, delicious, and totally foolproof. So, let’s get into it—because if I can do it, you definitely can too!
What Makes This Apple Pie So Easy?
Let’s face it: everyone loves apple pie. But if we’re being honest, some recipes make it seem like you need a Ph.D. in baking just to make a crust. Not this one. This easy apple pie skips the stress and uses store-bought crusts, which I’m all about. You can still make the filling totally your own, and no one will even know you didn’t roll your own dough. (It’s our little secret, okay?)
What I love about this apple pie recipe is that it’s quick and still feels like it’s straight from a cosy family kitchen. You know, the kind where you can almost taste the love in every bite.
Ingredients You’ll Need
You’re going to love how basic these ingredients are. No need for a ton of fancy stuff here! Here’s what you’ll need:
- 1 box of refrigerated pie crusts (yep, the kind that comes in a box)
- 6-7 medium-sized apples (Granny Smiths are perfect, but any tart apple will work)
- ¾ cup of granulated sugar
- 1 tablespoon of lemon juice
- 1 teaspoon of cinnamon
- ¼ teaspoon of nutmeg (it’s like the secret ingredient that makes it taste fancy)
- 2 tablespoons of butter (because… butter!)
- 1 egg (for an egg wash, so your crust looks golden brown and gorgeous)
How to Make This Easy Apple Pie
Now, let’s get down to business. Here’s how to make this apple pie in no time!
- Preheat Your Oven – First things first, heat your oven to 425°F (220°C). We want it nice and hot to give that crust the crispy, golden brown finish.
- Prepare the Apples – Peel, core, and slice your apples. You’re looking for thin slices here, about ⅛ inch thick. I always find that slicing apples quickly with a sharp knife is a little more satisfying than using a mandolin, but hey, whatever works for you.
- Mix the Filling – Toss the apple slices in a large bowl with the sugar, lemon juice, cinnamon, and nutmeg. Honestly, this is where the magic happens. The cinnamon and nutmeg create that warm, comforting aroma that makes you want to just hug your kitchen. Stir it all together until the apples are coated evenly.
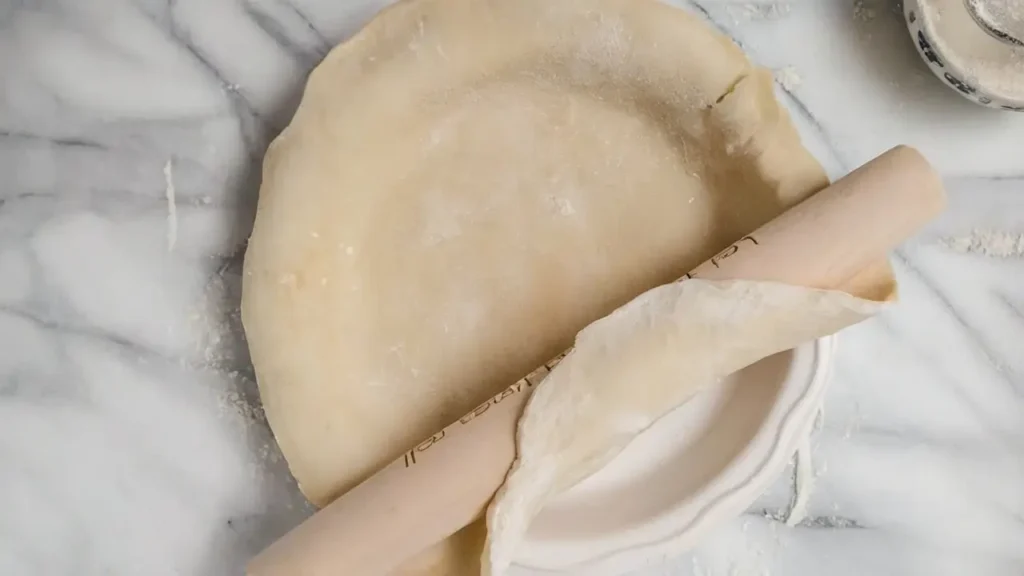
- Prep the Pie Crust – Unroll your pie crusts and lay one down in your pie dish. Don’t worry about it being perfect; just press it into the pan and let the edges hang over. Then, pour in that beautiful apple-filling mixture.
- Top It Off – Add a few little dollops of butter on top of the apples—about two tablespoons. This is going to make the pie filling so gooey and sweet when it bakes.
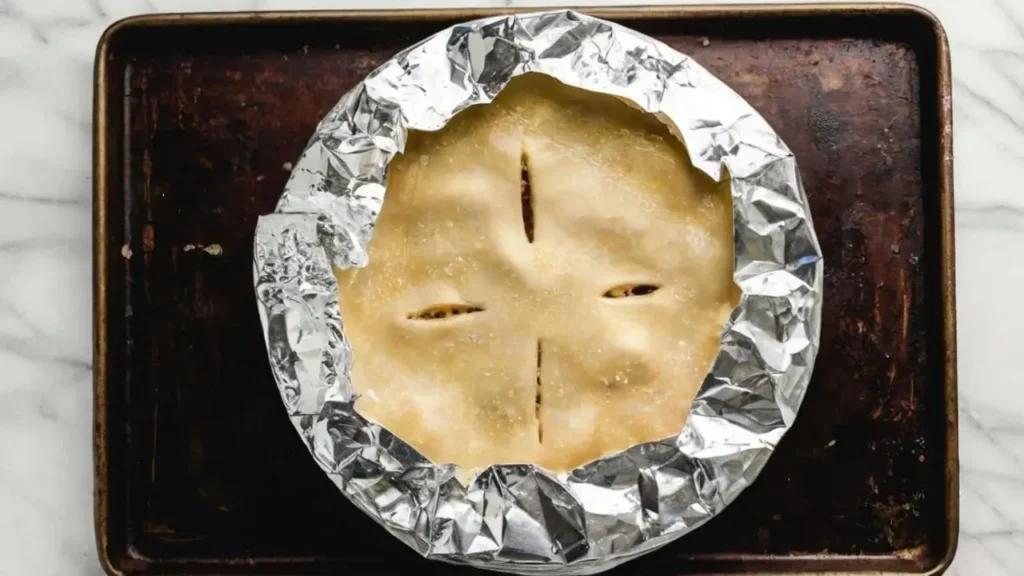
- Cover and Seal – Place the second pie crust on top of the apples. Gently press the edges together to seal, and then fold them over for a nice rustic look. You can crimp the edges with a fork if you’re feeling fancy, or just use your fingers. Then, cut a few slits in the top to let the steam escape.
- Egg Wash Time – Brush the top of the pie with an egg wash (just beat an egg and a tablespoon of water together). This gives the crust that gorgeous golden-brown finish. If you want to get extra, sprinkle a little sugar on top for a sweet, crunchy crust!
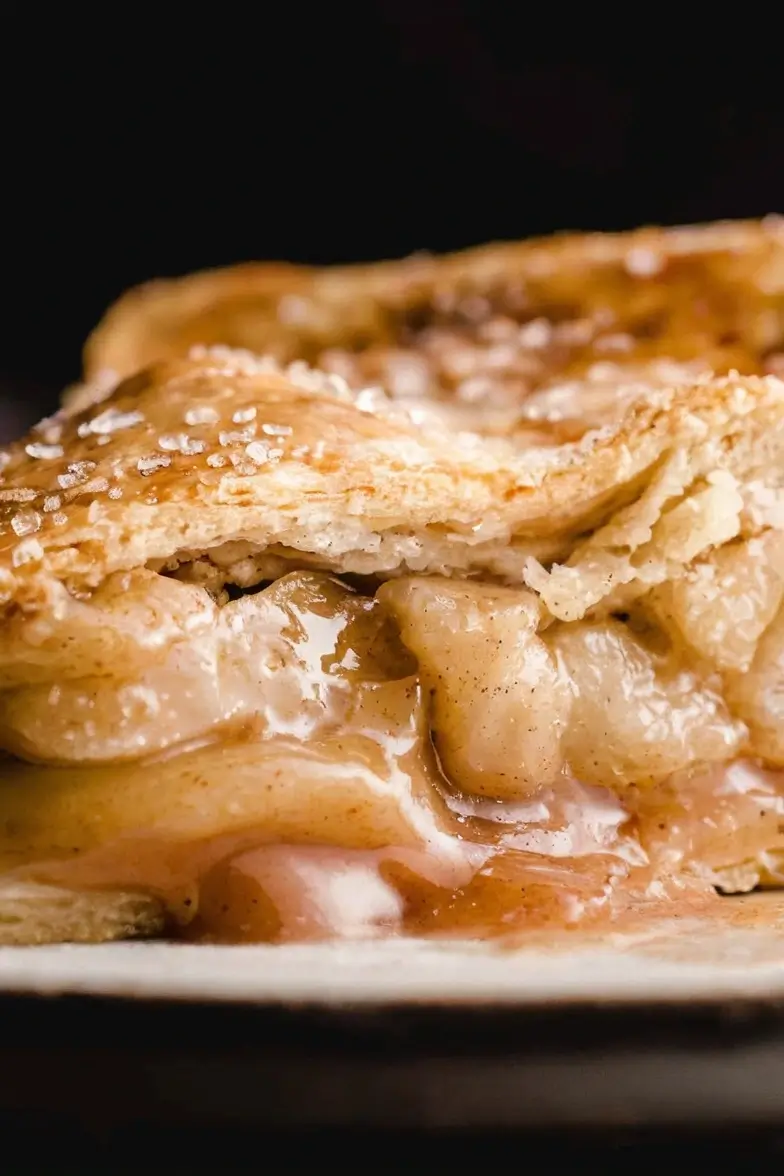
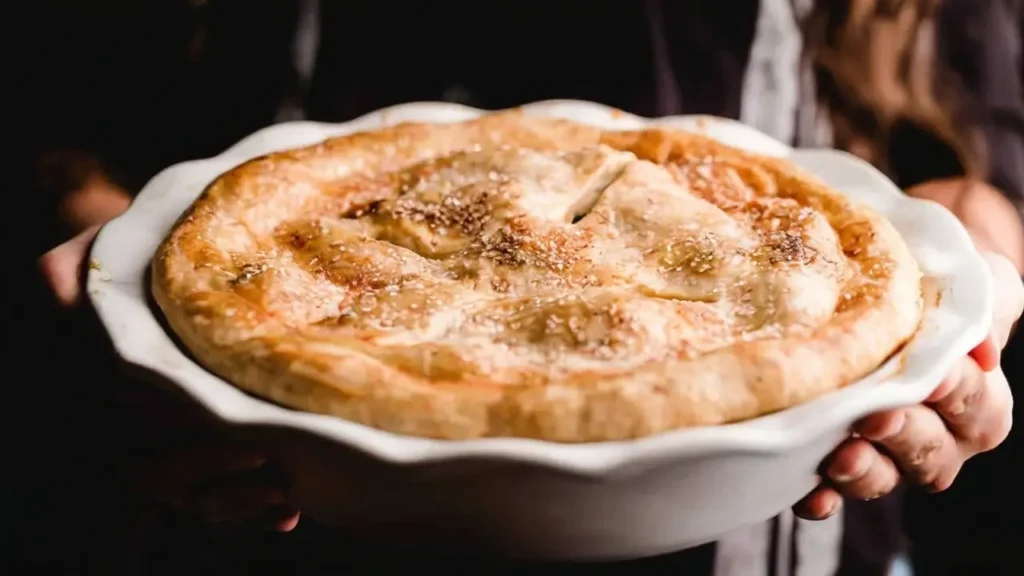
- Bake – Pop the pie in the oven and bake it for about 45-50 minutes. You’ll know it’s ready when the crust is golden, and you can see the filling bubbling through the slits. Mmm, the smell will drive you crazy (in a good way).
- Cool Down – Let your apple pie cool for at least 30 minutes. Trust me, as tempting as it is to dig in right away, letting it cool lets the filling set, so you get those perfect slices instead of a gooey mess.
How to Serve It
Okay, so you’ve got your pie out of the oven, and it looks amazing. But now, how do you serve it? Well, if you’re anything like me, you’ll want a big ol’ scoop of vanilla ice cream on top. Or, if you’re feeling extra indulgent, a dollop of whipped cream works wonders too. Some people even like a drizzle of caramel sauce, which—let’s be honest—makes everything better.
Why This Easy Apple Pie is Perfect for Beginners
If you’re new to baking, I get it. Sometimes, it feels like everyone else has their act together in the kitchen while you’re just trying to figure out how to turn on the oven. But here’s the deal—this easy apple pie is foolproof. You don’t have to worry about making the crust from scratch (trust me, I’ve been there, and it’s a mess), and the filling comes together in minutes. With just a few basic ingredients, you’ll have a pie that looks like it came straight from a bakery but took you no time at all. Plus, it’s so customizable! If you prefer your pie a little less sweet or with a dash of extra cinnamon, you can make those tweaks easily. That’s the beauty of this recipe—it’s incredibly forgiving.
A Fun Twist: Adding Your Favorite Toppings
Let’s be real—apple pie on its own is pretty amazing, but you can always level it up with your favourite toppings! Personally, I’m all about that whipped cream life, but here are a few other fun ideas that’ll take your easy apple pie to the next level (without making things complicated, of course):
- Vanilla Ice Cream: Classic, but always a hit. A scoop of vanilla ice cream melting over a warm slice of apple pie? It’s the best!
- Caramel Drizzle: A little drizzle of caramel sauce on top adds a sweet, buttery flavour that pairs beautifully with the tartness of the apples.
- Crispy Streusel Topping: If you’re feeling a little extra, sprinkle some oats, flour, butter, and brown sugar over the top before baking for a crunchy, sweet streusel finish.
These toppings are optional, but trust me—they make this pie a showstopper every time.
Tips for Making Your Apple Pie Even Easier
- Pre-sliced Apples: If you’re really pressed for time, you can grab pre-sliced apples from the store. They might not be as fresh, but hey, they’ll save you a ton of time peeling and slicing.
- Try a Crumble Topping: Instead of a top crust, you can make a quick crumble topping by mixing butter, brown sugar, flour, and oats. It’s a shortcut that still gives your pie that classic homemade feel.
- Make a Mini Pie: If you’re short on time or just want a personal dessert, try using a smaller pie dish or even a muffin tin for individual-sized apple pies. Bake them for about 20-25 minutes, and boom—mini apple pies that are perfect for one.
Why This Apple Pie is the Best Ever
At the end of the day, there’s something magical about a homemade apple pie. It’s comforting, it’s nostalgic, and it always brings people together. This easy apple pie recipe is perfect for anyone who wants that homemade flavour without the hassle. Whether you’re baking for a family dinner, a potluck, or just because you’re craving something sweet, this pie hits all the right notes.
So go ahead, give it a try! I promise, once you taste that buttery crust and sweet, spiced apple filling, you’ll never go back to store-bought pie again. It’s that simple!
There you go! A warm, easy, and totally delicious apple pie recipe that’s sure to impress. Can’t wait for you to try it! Let me know how it goes, and I’d love to hear your own tips and tricks for making the perfect pie. Happy baking! 🍏🥧
FAQs About Making the Best Easy Apple Pie
Q: Can I use frozen pie crust instead of refrigerated?
A: Absolutely! Just make sure to thaw it before you start so it’s easier to work with. You can use whatever’s easiest for you!
Q: What if I don’t have Granny Smith apples?
A: No worries! You can swap them out for Honeycrisp or Fuji apples, which will give your pie a little extra sweetness. A mix of tart and sweet apples is the best combo, but it’s all about what you’ve got in the pantry.
Q: Can I make this apple pie ahead of time?
A: Yep! If you want to save time, you can prep the pie a day ahead and store it in the fridge. Just pop it in the oven the next day for 10-15 minutes to warm it up. Or freeze the pie before baking and bake it straight from the freezer when you’re ready to serve!
Q: How do I know when my pie is done baking?
A: You’re looking for a golden-brown crust and bubbling filling. If you’re unsure, gently poke a knife or skewer through the slits on top to check if the filling is hot and bubbly.